Updated on November 19, 2025
If you’re thinking about replacing your roof, you’ve probably looked into composite shingles. They’re affordable, durable, and widely used across the Pacific Northwest. And if you’re handy, you might be wondering about how to install composite roofing—and can I install them myself?
A roofing project might look straightforward on the surface, but there’s a lot riding on every detail. From protecting your home from water to lining up every row just right, getting it wrong can cost you more in the long run. Here’s a simple overview of what it takes to shingle a roof—and why doing it right the first time really matters.
What Is Composite Roofing?
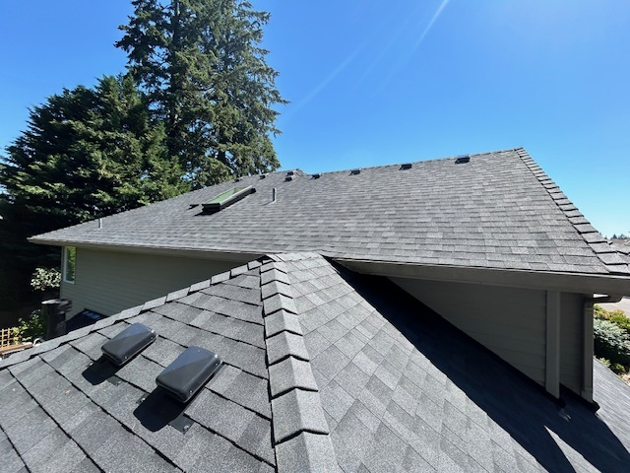
Composite shingles, otherwise known as asphalt shingles, are made from layers of fiberglass, asphalt, and granules. They’re designed to resist wind, rain, and sun while offering a clean, attractive look for all kinds of homes. Composite roofing materials are popular for a reason—it strikes a great balance between cost, performance, and appearance.
Because they’re lighter than tile or metal, composite shingles are easier to install. But that doesn’t mean the job is simple. Every part of your roofing system has to work together to shed water and protect your home’s structure.
Start with a Clean, Solid Roof Deck
Before installing new shingles, it’s critical to evaluate your roof deck. This is the flat surface underneath the shingles, often made from plywood or OSB. If the decking is soft, cracked, or warped, it needs to be replaced. Laying new shingles on damaged decking is like putting wallpaper over crumbling drywall—it might look okay at first, but it won’t last.
This is also the time to inspect the roof sheathing and make sure it’s nailed down securely with no loose or squeaky boards. A solid deck is the foundation of any successful roofing job.
Chalk Lines Help You Stay on Track
Composite shingles need to be aligned correctly or they won’t perform properly. That’s where chalk lines come in. By snapping horizontal guidelines across the roof, you can make sure every course of shingles stays straight from the edge of the roof to the ridge.
It’s easy to underestimate how quickly small errors can compound. If one row drifts off even slightly, you’ll end up with crooked rows and uneven overhangs. Shingle overlapping becomes inconsistent, and water may not drain the way it should.
Installing the Drip Edge and Flashing
The drip edge is a thin strip of metal installed along the eaves and rakes of the roof. It directs water away from the fascia and into the gutters, helping to prevent rot. Always nail the drip edge securely and make sure it lies flat. The underlayment will go over the drip edge at the eaves and under it along the rakes.
After the drip edge comes the metal flashings. These are installed in valleys, around chimneys, skylights, and anywhere else water might sneak in. Flashing is essential for preventing water from seeping into your home and causing long-term damage.
Underlayment and Starter Strip
Once flashing is in place, the next step is laying down underlayment. This layer goes directly over the decking to serve as a secondary water barrier. Whether you use felt or synthetic, it needs to be applied smoothly with no wrinkles or gaps.
Next, a starter strip is installed along the lower edge. This first row helps anchor the first full course and provides proper coverage at the eave. It’s designed to resist wind lift and reinforce the overhanging bottom of the roof edge.
Begin to Install Roof Shingles

Now it’s time to install roof shingles. You’ll work row by row, following your chalk lines, and staggering the seams between shingles in each course. Most shingles are fastened with four to six roofing nails each, driven just above the adhesive strip and spaced evenly.
Be careful not to drive nails too deeply or at an angle—this can reduce holding power and create points where water can get in. Shingles should be snug but not overly tight. Each new course of shingles should overhang the drip edge slightly and align with your layout lines.
Composite roofing relies on consistent overlap between rows to shed water properly. If shingles are misaligned or gaps form between tabs, water can find its way beneath the surface. Over time, this leads to rot, mold, or structural issues.
Laying rows of shingles requires patience and precision. You’ll also need to trim shingles to fit around vents, valleys, and roof edges. A utility knife and roofing square will help you make clean, accurate cuts.
Cap It Off with Ridge Caps
Once the field shingles are installed, it’s time to finish with ridge caps. These are special shingles or cut pieces of regular shingles laid over the roof’s peak to seal the ridge. Ridge caps protect the highest point of your roof from wind and moisture—and they give the whole roof a clean, finished look.
Installing ridge caps takes some finesse. They must be nailed properly and often require sealing strips or adhesive to stay in place during high winds.
How to Install Composite Shingles FAQs
1. Can I install composite shingles over my old roof?
In some cases, it’s possible to install new shingles over an existing layer, but it’s not always recommended. Multiple layers can hide damage to the roof deck and add unnecessary weight. A full tear-off ensures a longer-lasting roof and a clean surface for installation.
2. How long does a DIY roofing project usually take?
The timeline varies depending on the size and complexity of the roof. For a first-time DIYer, it could take several full days or longer. Professional crews often complete a full re-roof in one to two days, with the right tools, training, and team in place.
3. What happens if I install the drip edge or flashing incorrectly?
Improperly installing the drip edge or metal flashings can lead to water intrusion, rot, and structural damage over time. These components play a critical role in preventing water from getting underneath your shingles and into your home.
4. Do I need special nails for composite shingles?
Yes. Roofing nails should be corrosion-resistant, typically galvanized steel or stainless steel, and sized appropriately for the thickness of your roofing system. Using the wrong type or size can compromise the performance of the shingle overlapping and wind resistance.
5. Will doing the roof myself save me money?
You might save on labor costs up front, but if the installation isn’t done properly, repairs or full replacement down the line can end up being more expensive. Hiring professionals helps ensure your roof is installed correctly, covered by warranty, and built to last.
Why Doing It Right Matters
Installing a roof isn’t just about putting shingles in place. It’s about creating a complete system that sheds water, stands up to weather, and lasts for decades. Missing a flashing detail, skipping underlayment, or misaligning shingles can lead to leaks that may go unnoticed until significant damage is done.
Installing composite roofing is more than just laying down shingles. From the roof deck to the final ridge caps, every layer plays a role in protecting your home from the elements. If you’re thinking about tackling the job yourself, make sure you understand each step—and what’s at stake.
And if you’re not 100% confident? Reach out to Warner Roofing for an estimate. We’ll make sure your roofing project is done right the first time, so you can enjoy peace of mind for years to come.