Updated on April 15, 2025
If you’re thinking about giving your roof a facelift but aren’t sure where to start, you’re not alone. Many homeowners know they need a new roof—or at least some repairs—but the idea of navigating roofing materials, installation steps, and terminology can feel overwhelming. One of the best ways to enhance your home’s appearance and protection is by re-roofing with architectural shingles. But knowing how to re-roof with architectural shingles is something different.
In this guide, we’ll break down everything you need to know about re-roofing with architectural shingles, even if you’re completely new to roofing. We’ll cover what re-roofing is, how it differs from a full roof replacement, and walk you step by step through the re-roofing process. Whether you’re considering tackling it yourself or want to understand the process before hiring a roofing contractor, this blog is here to help.
What Is a Re-Roof?
A re-roof, also called an overlay, is the process of installing new roof shingles directly over an existing layer of shingles. It’s a more affordable, less invasive alternative to a full roof replacement, as it skips the step of tearing off the old shingles and disposing of them.
Here’s how re-roofing works:
- Instead of removing the existing asphalt shingles, a second row of shingles is installed on top of them.
- This saves time and labor, as there’s no need to tear off the old roof.
- It’s only possible if your current roof has one layer of shingles. If you already have two, you’ll need a full replacement.
Re-Roofing vs. Roof Replacement
Understanding the difference between a re-roof and a roof replacement is important before starting your roofing project.
Re-roofing (overlay)
Adds a second layer of shingles over an existing one. It’s faster and less expensive but doesn’t allow for inspection or repair of the underlying roof deck. It’s suitable only if your current roof is in otherwise good shape.
Roof replacement
Involves stripping all existing shingles down to the roof deck and installing new underlayment and shingles. It’s more expensive but allows your roofer to inspect the decking, replace damaged areas, and ensure the roof is structurally sound.
If your roof is leaking, sagging, or showing signs of major damage, a replacement is usually the better long-term choice. But if your roof is mostly intact and you’re just looking to refresh it, re-roofing with architectural shingles can be a smart move.
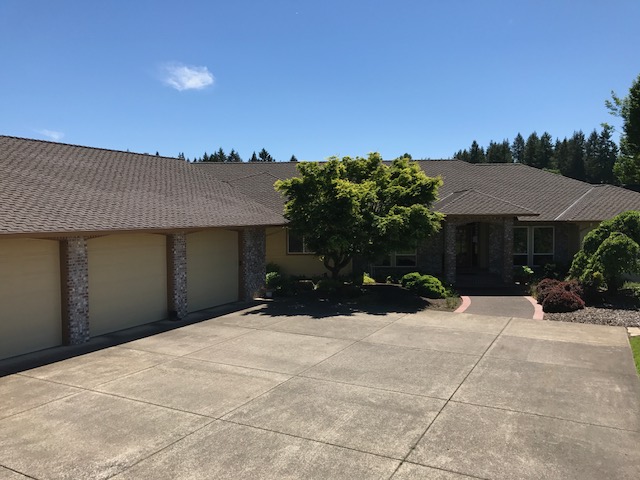
What Are Architectural Shingles?
Architectural shingles are a type of high-quality asphalt shingles known for their durability and dimensional appearance. Unlike traditional 3-tab shingles, which lie flat, architectural shingles have a layered, textured look that adds depth and character to your roof.
Here’s why they’re a great choice:
- Enhanced durability: They are thicker and more robust than standard shingles, with better wind and impact resistance.
- Longer lifespan: Many architectural shingles last 25–30 years or more.
- Better aesthetics: Their design mimics wood shake or slate tiles, giving your home a more upscale look.
- Improved resale value: Architectural shingles are considered a premium roofing product, which can enhance your home’s curb appeal and marketability.
How to Re-Roof With Architectural Shingles: Step-by-Step Guide
Now that you understand the basics, let’s walk through the full re-roofing process using architectural shingles.
Step 1: Inspect the Existing Roof
Before doing any work, thoroughly inspect your current roof:
Look for signs of sagging, rot, or soft spots in the decking. If you find any, re-roofing isn’t the right choice.
Check that your existing shingles are lying flat and not curling or buckling.
Confirm that only one layer of shingles is present. Building codes typically limit roofs to two layers max.
If your roof passes inspection, you can move on to the next step.
Step 2: Gather Materials and Tools
Here’s what you’ll need:
Architectural shingles (calculate square footage and add 10% for waste)
Roofing nails and hammer or nail gun
Roofing underlayment (if any repairs are needed)
Chalk line and measuring tape
Utility knife
Drip edge
Roofing cement or sealant
Safety gear: harness, gloves, non-slip shoes, ladder
Ridge cap shingles
Step 3: Prepare the Surface
Although you won’t be removing the old shingles, you still need to prepare the surface:
Remove any loose or damaged shingles from the old roof.
Nail down raised nails and re-secure any loose areas.
Sweep off debris, moss, and dirt so the new shingles can sit flush.
Step 4: Install a Drip Edge (If Needed)
If your existing roof doesn’t already have a drip edge—or the old one is damaged—you’ll need to install a drip edge before laying new shingles.
The drip edge is a metal flashing installed along the eaves and rakes of the roof.
It helps direct water away from the fascia and into the gutters, preventing wood rot and leaks.
Nail it down using roofing nails every 8–10 inches.
Step 5: Start the First Row of Shingles
Begin at the bottom edge of the roof (typically the eaves) and work your way up.
Lay down the first row of shingles, aligning them carefully and using your chalk line for reference.
Overlap each shingle as directed by the manufacturer.
Stagger the joints of the shingles to prevent water from seeping through.
Architectural shingles are laminated, so they’re heavier and slightly more complex to install than basic 3-tab shingles—but the payoff is worth it.
 Step 6: Continue Up the Roof
Work your way upward, row by row, nailing each shingle securely in place.
Follow the staggered pattern and nail placement guidelines for your specific brand of shingles.
Make sure every row of shingles is tightly sealed to the row beneath it to prevent wind and water infiltration.
Trim shingles as needed with a utility knife to fit around vents, chimneys, or other roof features.
Step 7: Install Ridge Cap Shingles
Once the main roof is covered, you’ll need to install ridge cap shingles along the peak.
These are specially designed to bend over the ridge and provide a finished look while sealing the vulnerable top seam of the roof.
They also help with ventilation when installed over a vented ridge.
Nail them in place and seal the ends to keep out moisture.
Step 8: Clean Up and Inspect
Clear the roof of all debris, nails, and materials.
Clean out gutters to remove any stray shingle granules.
Do a final walk-around to ensure all shingles are properly aligned and fastened.
Should You DIY This Roofing Project?
While re-roofing may sound straightforward, it’s a demanding and potentially dangerous job—especially with architectural shingles, which are heavier and trickier to install than basic shingles. Not to mention if there are skylights, multiple angles (dormers), chimneys, etc. in addition to venting.
Here’s why hiring a roofing contractor like Warner Roofing & Construction is a smart move:
- Safety: Working on a roof is hazardous without proper training and equipment.
- Skill: Installing architectural shingles correctly takes precision to ensure watertight seals and lasting performance.
- Code compliance: A professional will ensure your re-roof meets local building codes.
- Peace of mind: With expert installation, you can trust your roof will last—and be backed by a warranty. More importantly, we’ll be able to tell you if a re-roof is even feasible.
FAQs About Re-Roofing With Architectural Shingles
- Can I re-roof over two layers of shingles?
No. Most building codes limit homes to a maximum of two layers of roofing. If your current roof already has two layers, you’ll need a full tear-off and roof replacement.
- How long do architectural shingles last compared to 3-tab shingles?
Architectural shingles typically last 25–30 years, while 3-tab shingles usually last around 15–20 years. Their thicker construction makes them more resistant to wind, hail, and wear.
- How much does it cost to re-roof with architectural shingles?
Costs vary depending on roof size, pitch, material quality, and labor. Re-roofing is usually 20–40% less expensive than a full replacement. To get an accurate quote, contact Warner Roofing for an inspection and estimate.
- What if my roof deck is damaged—can I still re-roof?
No. Re-roofing only covers existing shingles. If your roof deck has any rot or structural damage, it must be replaced, which requires a full tear-off. A licensed roofer can help assess your roof’s condition.
- Will re-roofing with architectural shingles increase my home’s value?
Yes. Architectural shingles add curb appeal and durability, which can boost resale value and attract buyers who appreciate a high-quality roofing system.
Call Warner Roofing & Construction Today
Re-roofing with architectural shingles is a great way to upgrade your home’s protection and appearance—but it’s not a project to take lightly. From choosing the right materials to ensuring every ridge cap shingle is perfectly installed, the details matter.
At Warner Roofing & Construction, we’ve helped homeowners across Vancouver, WA, and surrounding areas navigate every type of roofing project, from repairs and re-roofs to full roof replacements. If you’re not sure whether your home qualifies for a re-roof—or if you just want expert eyes on your current roof—get in touch with us today.
We’re happy to provide an inspection, answer your questions about architectural shingles, and give you a clear, no-pressure estimate. Let’s make sure your roof looks great and stands strong for years to come.