Updated on April 10, 2025
A Simple Way to Brighten Your Home
Have a dark hallway, bathroom, or closet that always feels a little gloomy—even in the middle of the day? You’re not alone. Many homeowners struggle with areas in the home that just don’t get enough natural light. But the good news is, there’s an easy, affordable solution that doesn’t involve adding a window or cutting a huge hole in your roof.
It’s called a solar tube, and it could be the bright idea your home needs.
At Warner Roofing & Construction, we’ve helped homeowners all over the Vancouver and Southwest Washington area bring more light into their homes—safely, efficiently, and with expert craftsmanship. If you’ve never heard of solar tubes before, don’t worry. We’ll walk you through what they are, how they work, and how easy it is to have one installed.
What Is a Solar Tube?
A solar tube—also called a sun tunnel or light tube—is a type of skylight system designed to bring natural sunlight from your roof down into rooms inside your home.
But unlike traditional skylights, which are large, window-like panels built into the roof, solar tubes use a small, highly reflective tunnel to carry sunlight from the outside to the ceiling of a room.
Here’s how it works:
- A clear dome sits on top of your roof and collects sunlight.
- That light travels down a mirrored tube.
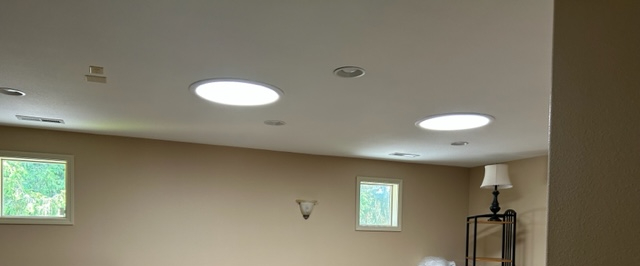
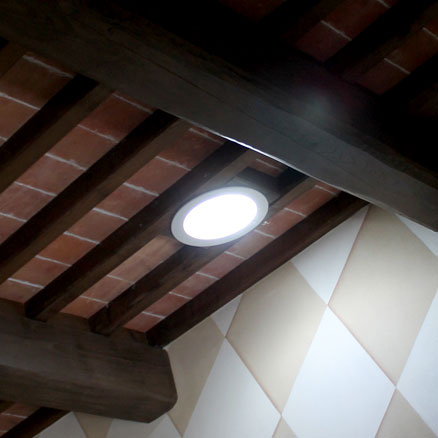
- A diffuser on the ceiling of your interior room spreads the light evenly, creating a soft glow that looks just like natural daylight.
It’s a smart, compact way to get sunlight where you need it—especially in rooms that don’t have windows or are far from exterior walls.
The Solar Tube Installation Process
If you’re wondering whether this is a long or complicated job—rest easy. Installing a solar tube is usually quick and straightforward when done by an experienced roofing professional. Here’s what the process looks like when you call Warner Roofing:
1. Planning and Inspection
First, we inspect your roof and attic space to find the best location. We look for a straight path between the roof and the ceiling of the room you want to brighten. We also check to make sure your roof is in good shape—since we’ll be cutting into it, it’s important that everything is solid and secure.
2. Cutting the Roof Opening
Next, we carefully cut a small hole in the roof—usually about 10 to 14 inches in diameter, depending on the tube size. This opening will hold the dome that collects sunlight.
3. Installing the Roof Dome and Flashing
We then place the dome on the roof and install flashing, which is a waterproof barrier that prevents leaks. This part is crucial, and it’s where our roofing experience really matters. Proper flashing means your solar tube won’t cause leaks or damage later on.
4. Connecting the Tube
Once the dome is secure, we install the reflective tube that runs from the roof down to your ceiling. This tube may be rigid (for straight paths) or flexible (for curved paths around obstacles).
5. Cutting the Ceiling Hole and Installing the Diffuser
Inside your home, we cut a matching hole in the ceiling and fit it with a diffuser. This diffuser spreads the sunlight evenly throughout the room, creating a soft, natural effect that mimics daylight.
6. Final Sealing and Inspection
Finally, we make sure everything is sealed, secure, and working perfectly. We clean up the workspace and make sure you’re happy with how everything looks and feels.
In most cases, solar tube installation takes just a few hours—sometimes even less. It’s one of the fastest ways to make a noticeable improvement in your home without a major renovation. Of course, if your attic space is tight or your roofing is more complex, it may take a little longer.
And if you want to do it yourself but don’t have particularly good DIY skills, it could take a lot longer (and you may end up doing more damage to your roof). But with Warner Roofing, you’ll get a clear timeline and expert service every step of the way.
Benefits of Installing a Solar Tube
 Now that you know what a solar tube is and how it’s installed, let’s talk about why you might want one in the first place. There are plenty of good reasons to consider adding a solar tube to your home:
- Natural Light in Dark Spaces
A solar tube brings daylight into areas that don’t have windows, like hallways, closets, bathrooms, or interior kitchens. It brightens up spaces that would otherwise feel dark and closed-in.
- Energy Savings
Because solar tubes use sunlight, they reduce the need to turn on electric lights during the day. That means lower energy bills—especially in the summer when you don’t want heat from lightbulbs warming up your home.
- Quick, Non-Invasive Installation
Compared to traditional skylights, solar tubes are much easier and faster to install. They don’t require major structural changes, and the job can usually be done in less than a day.
- Affordable Option
Solar tubes are typically less expensive than installing a full skylight, making them a great choice for homeowners who want to improve their home without a big price tag.
- Better Mood and Comfort
Natural light is good for your health. It can boost your mood, help regulate sleep, and make your home feel more welcoming.
- Adds Value to Your Home
Any home upgrade that improves lighting and reduces energy use is a smart investment. Buyers love natural light!
Where Can You Install a Solar Tube?
You can install a solar tube just about anywhere that has a direct path between your roof and ceiling. The most common places include:
- Hallways
- Bathrooms
- Laundry rooms
- Closets
- Kitchens
- Home offices
The key is having access from the roof and enough space for the tube to fit. During your consultation, Warner Roofing will help determine the best placement for your home.
Common Questions About Installing a Solar Tube
We get a lot of questions from homeowners who are curious about solar tubes but aren’t sure if they’re the right fit. Here are a few of the most common:
Do solar tubes work on cloudy days?
Yes! While you’ll get the most light on sunny days, solar tubes still collect and reflect daylight even when it’s overcast.
Can solar tubes leak?
Not if they’re installed correctly. That’s why it’s important to work with experienced roofers like Warner Roofing who know how to properly flash and seal the dome.
Will it make the room too bright?
Nope. The diffuser on the ceiling softens and spreads the light, so it doesn’t feel harsh or glaring.
Can I install one myself?
While there are DIY kits available, cutting into your roof is something we always recommend leaving to professionals. Improper installation can lead to leaks or roof damage. We’ll make sure it’s done right the first time.
Will it work if I have an attic?
Yes. In most cases, the reflective tube can run through attic space without any problems. Flexible tubing can also help route around obstacles.
How much does a solar tube cost?
Costs vary depending on the size of the tube and the complexity of the install. But solar tubes are generally more affordable than full skylights, and we’re happy to provide a free estimate.
Why Choose Warner Roofing for Your Solar Tube Installation?
At Warner Roofing & Construction, we’ve built our reputation on craftsmanship, care, and customer trust. When it comes to working on your roof, we know how important it is to get things right—especially when cutting into your home’s first line of defense.
Our team goes through rigorous training with all types of roofing products so we can offer flawless installations and long-lasting results. We treat your home like our own, keeping the workspace clean and finishing every job with pride.
Whether you want to brighten a small space or save energy with natural light, Warner Roofing is your trusted partner for professional solar tube installation in the Pacific Northwest.
Ready to Brighten Your Home?
If you’ve been living with dark corners and windowless rooms, a solar tube might be the perfect solution. It’s quick, affordable, and surprisingly powerful for such a small upgrade.
Contact Warner Roofing today to schedule your estimate. We’ll walk you through the options, inspect your roof, and help you bring more light into your life—one room at a time.