Published on April 9, 2024
Shedding Light: A Comprehensive Guide to Installing a Skylight
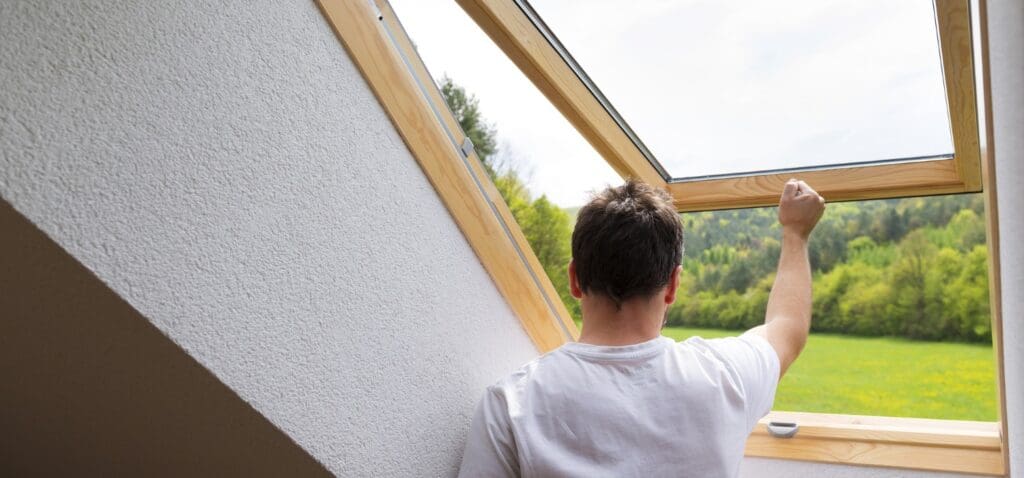
Imagine waking up to the gentle glow of sunlight streaming through your ceiling, filling your home with warmth and vitality. Skylights offer homeowners a unique opportunity to invite the beauty of the outdoors into their living spaces, enhancing ambiance, and well-being. However, installing a skylight can seem daunting for those unfamiliar with skylights or even roofing for that matter.
This comprehensive guide will walk you through everything you need to know about installing skylights, from choosing the right type to ensuring a seamless installation process. However, if you don’t really see yourself as a do-it-yourselfer, we recommend working with an experienced contractor like Warner Roofing and Construction.
While DIY installation may be tempting, hiring a professional ensures proper installation, adherence to local building codes, and warranty protection. Experienced installers have the expertise and equipment to handle the complexities of skylight installation safely and efficiently.
Consequences of Poor Installation
If a skylight isn’t put in the right way, it can cause a lot of problems. Water might leak in when it rains, which can damage your ceiling and walls. Also, if it’s not sealed properly, air can escape from your home, making it harder to keep warm or cool. Plus, it might not look right or fit well, which can be frustrating.
In some cases, a poorly installed skylight might even be dangerous if it falls or breaks. Improper flashing, inadequate sealing, and subpar workmanship can result in costly repairs and potential safety hazards. It’s really important to make sure it’s done correctly by a professional who knows what they’re doing.
 What to Know About Installing a Skylight
From choosing a skylight, to how it’s installed, to the finishing touches, the installation process is straightforward but requires a lot of skill. And any time you cut a big hole in your ceiling, you want to make sure it’s done right. So let’s take a look at the different kinds of skylights, prep work, and the installation process.
Curb Mounted vs. Deck Mounted
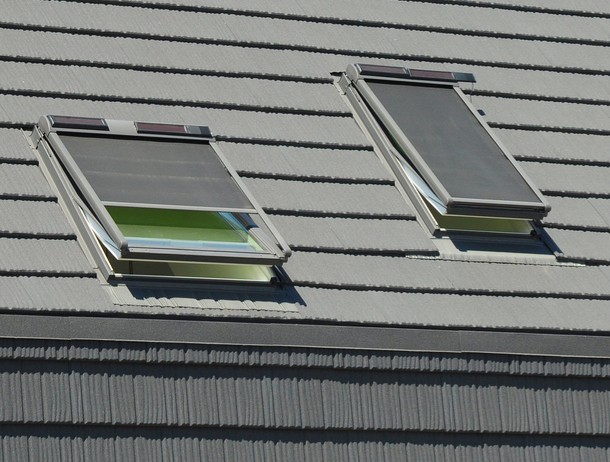
In most cases, there are two different types of skylights: curb and deck-mounted. Curb-mounted skylights sit on a raised frame, known as a curb, which is installed on the roof. They are ideal for roofs with a steeper slope and offer excellent water drainage capabilities. Flashing is attached to the sides of the skylight onto the curb.
Deck-mounted skylights are installed flush with the roof deck; these skylights provide a sleek, modern look and are suitable for roofs with minimal slope. They typically require less structural modification during installation and are popular with existing homes while curb-mount skylights are often found on new construction.
Key Considerations and Preparation Steps
Assessing Roof Conditions
Before installing a skylight, it’s essential to evaluate the condition of your roof to ensure it can support the added weight and accommodate the necessary modifications. Will you need to cut any structural support to make room for the skylight? That may require more work than you’re ready to take on.
Choosing the Right Location
Select a location for the skylight that maximizes natural light exposure while minimizing potential obstructions such as vents, chimneys, or nearby trees. Will it go in the bedroom, the living, or even the bathroom? Make sure you know exactly where the skylight is going–you don’t want to cut the hole and realize you’re off a few feet.
Gather Materials
To install a skylight, you’ll need a skylight kit containing the skylight itself, roofing nails or screws, various types of flashing (such as saddle flashing, step flashing, and sill flashing), roofing sealant, shingles or roofing material to match your roof, insulation if needed, and plywood or OSB for framing if necessary.
You’ll require tools such as a hammer or screwdriver, a circular saw or reciprocating saw for cutting the roof opening, a drill or screw gun, a level for ensuring the skylight is installed straight, a ladder or scaffolding for safe access to the roof, a caulking gun for applying sealant, and optionally, roofing tar for extra waterproofing.
Having all these materials and equipment ready before starting the installation process will ensure that you can complete the project efficiently and effectively without having to make several trips to your friendly neighborhood hardware store with a hole in your roof.
 Step-by-Step Installation Guide: From Rough Opening to Final Flashing
- Step 1: Marking the Rough Opening
Using a Chalk Line: Create precise guidelines on the roof surface to outline the rough opening dimensions, ensuring accuracy during the cutting process. - Step 2: Cutting the Opening
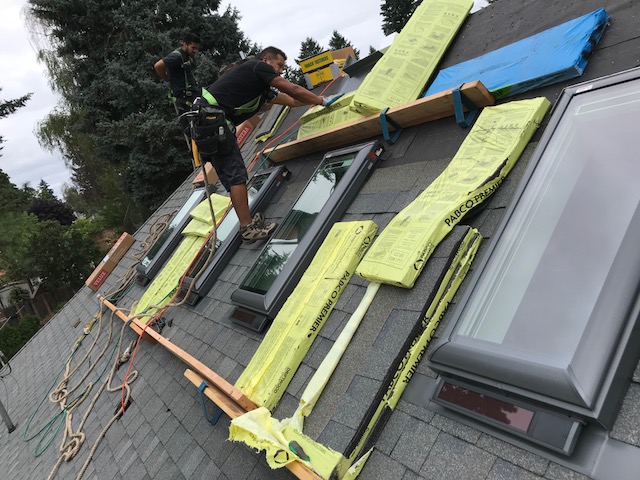
Exercise Caution: Use appropriate safety equipment and follow manufacturer guidelines when cutting through the roof decking to create a rough opening. - Step 3: Installing the Skylight Frame
Securing the Frame: Position the skylight frame within the rough opening and fasten it securely to the roof deck using roofing nails or screws. Verify that the skylight frame is level and square before securing it in place to prevent future issues with operation or leakage. You may need to build additional framing to hold the skylight depending on the size or the construction of your roof. Make sure to replace the insulation that was removed or to add additional insulation to fill in any gaps. - Step 4: Saddle and Step Flashing Installation
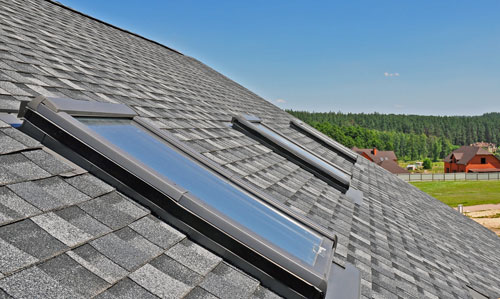
Ensuring Waterproofing: Install the saddle flashing along the bottom edge of the skylight frame and apply step flashing along the sides to prevent water infiltration. - Step 5: Sealing and Flashing the Bottom Edge
Sill Flashing: Apply sill flashing along the bottom of the skylight frame, ensuring a watertight seal between the skylight and the roof surface.
Final Steps and Considerations
Applying Sealant: Seal all joints and seams with appropriate roofing sealant–especially along the sides and the corner of the skylight–to further enhance waterproofing and weather resistance. Once the skylight is in place, you’ll need to finish off the drywall/trim pieces around the skylight on the interior of the home and paint to match the rest of the ceiling.
FAQs: Addressing Common Concerns
1. How much does it cost to install a skylight?
The cost of skylight installation varies depending on the type of skylight type, roof condition, and labor rates. On average, homeowners can expect to pay between $1,500 and $5,000 for installation, excluding the cost of the skylight itself.
2. What are the benefits of installing a skylight?
Skylights enhance natural light levels, reduce reliance on artificial lighting, improve indoor air quality, and create a sense of spaciousness and connection with the outdoors. Additionally, they can enhance energy efficiency by reducing the need for electric lighting during daylight hours.
3. Will installing a skylight affect my home’s energy efficiency?
Properly installed and sealed skylights can enhance energy efficiency by allowing natural light to penetrate deep into the interior, reducing the need for artificial lighting. However, skylights must be properly insulated and equipped with energy-efficient glazing to minimize heat loss and gain.
4. Do skylights require maintenance?
Regular maintenance is essential to ensure the long-term performance and durability of skylights. This includes inspecting seals, flashing, and glazing for signs of wear or damage, cleaning the skylight surface, and clearing debris from drainage channels to prevent water buildup.
5. Can I install a skylight in any room of my home?
While skylights can be installed in most rooms, it’s essential to consider factors such as roof orientation, structural support, and potential obstructions. Consultation with a professional installer can help determine the feasibility and optimal placement of skylights in your home.
Can I Install a Skylight?
 While DIY installation is possible for those with advanced carpentry and roofing skills, it’s generally recommended to enlist the services of a qualified professional. Skilled installers can ensure proper fit, alignment, and waterproofing, minimizing the risk of installation errors and associated complications.
Installing a skylight is a rewarding endeavor that can transform your living space, infusing it with natural light, warmth, and beauty. By following this comprehensive guide and consulting with experienced professionals, homeowners can navigate the installation process with confidence, ensuring optimal results and lasting enjoyment for years to come.
Let Warner Roofing remove the stress, hassle, and possible confusion from installing a skylight. We have decades of experience with installations of skylights and solar tubes and know how to seal them up to protect your roof and the interior of your home.
Even during those gloomy winter months, you’ll still be able to bathe your home in natural light. Because you won’t need interior lights, you’ll even save a little money on electricity bills all year long. Reach out to Warner Roofing and Construction for a free estimate and see how we can bring a little bit of the outdoors into your home!